1. Overview
There are two parts in this lab and Part I is expected to be completed in lab (Jan 30, 06) and Part II by Feb 5, 06. (Feb 5, 06 is a strict deadline for the complete lab.)
1.1 Part I:
The objective of this part is to build a "simple" web-browser using Visual-Studio.NET. This lab does not about .NET. It expects you to know how to program in Visual-Studio environments. Guidelines will be provided.
1.2 Part II:
The objective of this part is to get you some hands on experience with web-servers. We will use the Temple server (astro) for the purpose.
Optional reading: The following is the RFC (Request For
Comments) document for HTTP 1.1, where you can find information
from:
Http
1.1 standard: rfc2068
2. Description
2.1 Part I:
2.1.1 Web-browsers and Web-servers
Write a one page
Word-document describing, what is a webserver and
what does it do? What is a web broswer and what does it do?(Just a
couple of sentences) List some common used webservers and
webbrowsers.
You can use Internet to find the
information. But the description must be in your own words
(must not be copied)
2.1.2 Developing
web-browser:
Below are guidelines that help you to
build the browser.
Launch Visual Basic.NET
Choose Windows application project from the New Project dialog box.
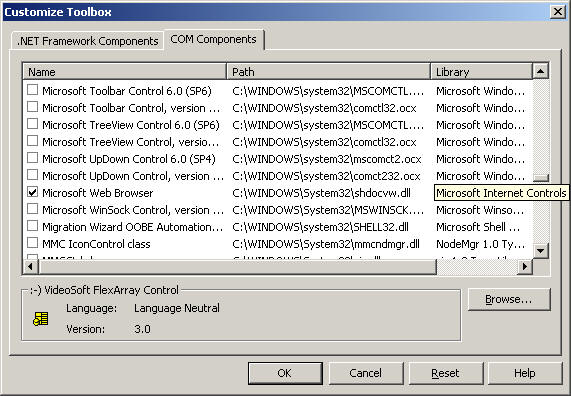
Right-click Toolbox on the left side of the screen, and click Add/Remove Items (If you don't see toolbox you can use the View menu to view the toolbox)
Check the box next to Microsoft Web Browser, and click OK. Notice the new icon in the toolbox for the WebBrowser Control.
Make your form a bit larger so that you have more room to work.
Select the WebBrowser control, and draw a box on your form covering approximately three-quarters of the bottom of your form. You have just created the area in your Web browser where the Web pages will be viewed.
To make an Address bar, select the TextBox control from the toolbox, and draw a rectangular box above the WebBrowser control on your form.
Add a command button to your form by selecting the CommandButton control and placing it just next to your Address bar. You can change the caption Command1 to anything you want by typing a new caption. e.g. Go To
Finally,
to make this work, double-click the command button you just created, and
add the following line of code:
AxWebBrowser1.Navigate(TextBox1.Text)
Build
the project from Build Menu and then go
to bin directory of the application folder (folder in which
you created your application) and double click the .exe file to start your new Web browser. Type any URL in your
Address bar, press the navigation button that you created, and
the content appears below. You have to build the project
for the changes in code to be reflected in the application.
This new Web browser that
you just created contains all of the HTML rendering capabilities
of Internet Explorer.
Create
a few more buttons on your form like "forward", "back",
"refresh" by adding the following lines of
code:
AxWebBrowser1.GoForward ()
AxWebBrowser1.GoBack()
AxWebBrowser1.CtlRefresh()
Add one or two more features/functions to this browser which you can think of. Use your creativity here. You can get help by click help->index->webBrowser object in Visual Basic.
Make sure you handle exceptions. Handling exceptions in VB is done using Try Catch blocks as I will show you in the lab. For hints you can look at http://www.vbdotnetheaven.com/Code/Jun2003/2009.asp
Screen shot showing how to add web browser control.
The
above instructions are modified from Microsoft's
offical instruction.
A site for your
reference:
http://www.juicystudio.com/tutorial/vb/http.asp
2.2 Part II:
2.2.1 Web-servers
Try to think, search for information on the Internet and write about 1-3 sentences of how a web-browser and a web-server communicate.
2.2.2 Hands-On
You will do a part of the work that a browser does. Below are the steps.
2.2.2.1 Logging into your astro account using Putty.
Launch Putty application (look for it in the start menu).
Type "astro.temple.edu" for Host Name and select SSH protocol (as shown in the screenshot below)

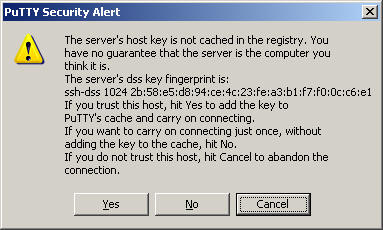
Click open and then select Yes if prompted with a dialog box. (Screenshot below)
Enter your accessnet username and password (TUmail username and password) and select the option 4 from the menu. You will then be at the "command prompt" of the astro server.
2.2.2.2 Communicating with web-server.
At the command prompt type telnet astro.temple.edu 80 and then hit enter to connect to the server (astro.temple.edu is the server name and 80 is the port number for web-server program on astro.temple.edu).
Then once you are "in" type GET /~username/somehtmlfile HTTP/1.0 and then hit enter twice. (username is your accessnet username and somehtmlfile is the name of the file you wish to retrieve from the server. Eg. index.html).
To exit the connection type "ctrl+]".
Try to see what you get back from the server (Hint: it has two parts of information). Explain what you get in about 2-3 sentences.
3. Submit (to nagesh@temple.edu)
Email subject: 230-xxxx-Lab-y
(xxxx- last four digits of your TUID, y-lab number)
Email content: Attachments of the documents you typed your answers in.