1. Overview:
You have two parts for this lab (both to be completed by Jan 30 midnight - STRICT DEADLINE)
1.1 Part I:
Publish website on a server
In this part you will learn how to publish a website on a server so that the site is accessible over the Internet. This lab expects you to have prior experience with designing websites either using plain HTML editors (like Notepad or Textpad) or some tools like Microsoft Frontpage or Dreamweaver.
1.2 Part II:
Password protecting pages on your website
In this part you will learn how to make some/all of the pages in your website password protected.
2. Description:
2.1 Part I:
2.1.1 Guidelines for content
Below is some information that is expected to be on your website.
1. Some information about yourself (such as school status, major etc). (Optional)
2. An Email link.(Must)
3. Several hyperlinks to your favorite Web spots. (Optional)
4. Use clickable images, that is , images that when clicked on, activate a link. (Must)
5. Create a counter that counts how many times your page has been accessed,
(refer to http://www.temple.edu/cs/web/ for help on counters) (Must)
6. Make your page more attractive (change the background color, text color, or animated images, etc)
(Optional)
2.1.2 Publishing onto a server
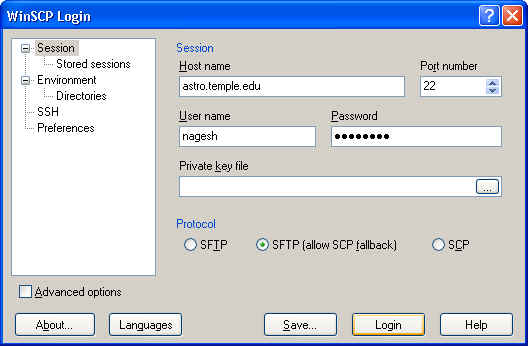
We will use WinSCP (Look using Start menu) software to publish files to astro (Temple's Unix server).
2.1.2.1 Launch the program and enter the "Host name", "User name", "Password" and click Login. Use your AccessNet account for Temple (Tumail account).
2.1.2.2 Note down the path (on the blue bar of the right side pane "/homee/052/nagesh") You are going to need that path in part II (for $HOME variable).
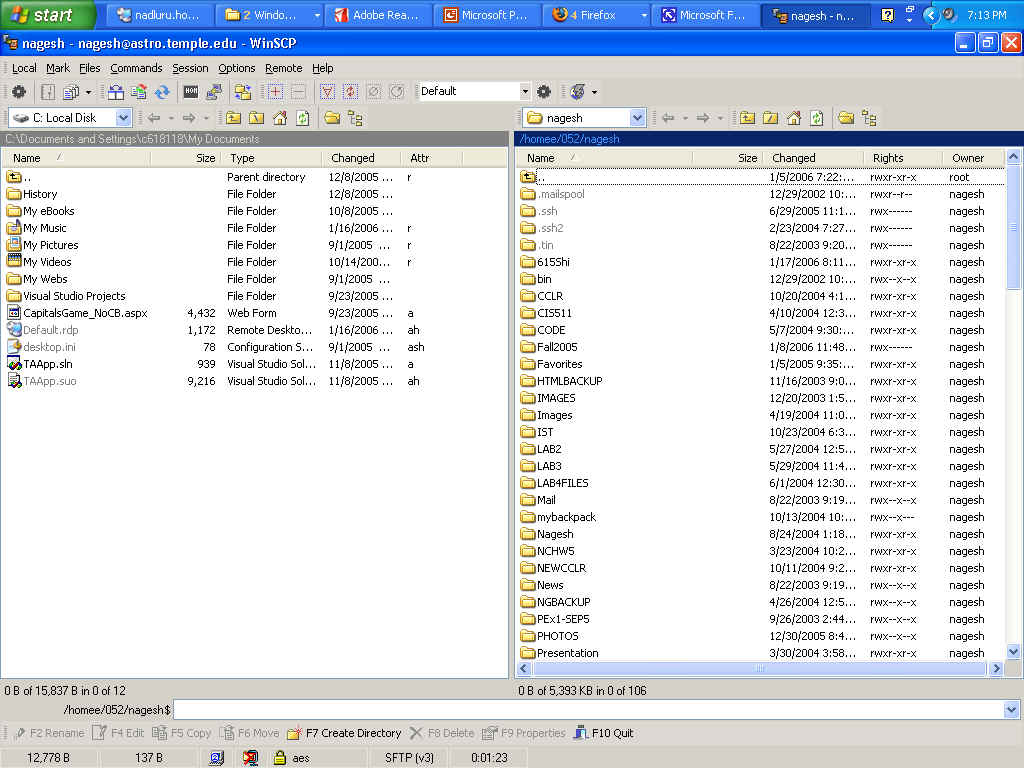
2.1.2.3 You can browse the local computer using left side pane and browser the server using right side pane and you can drag and drop files. Publish (drag and drop) all your web site files into public_html folder on the server.
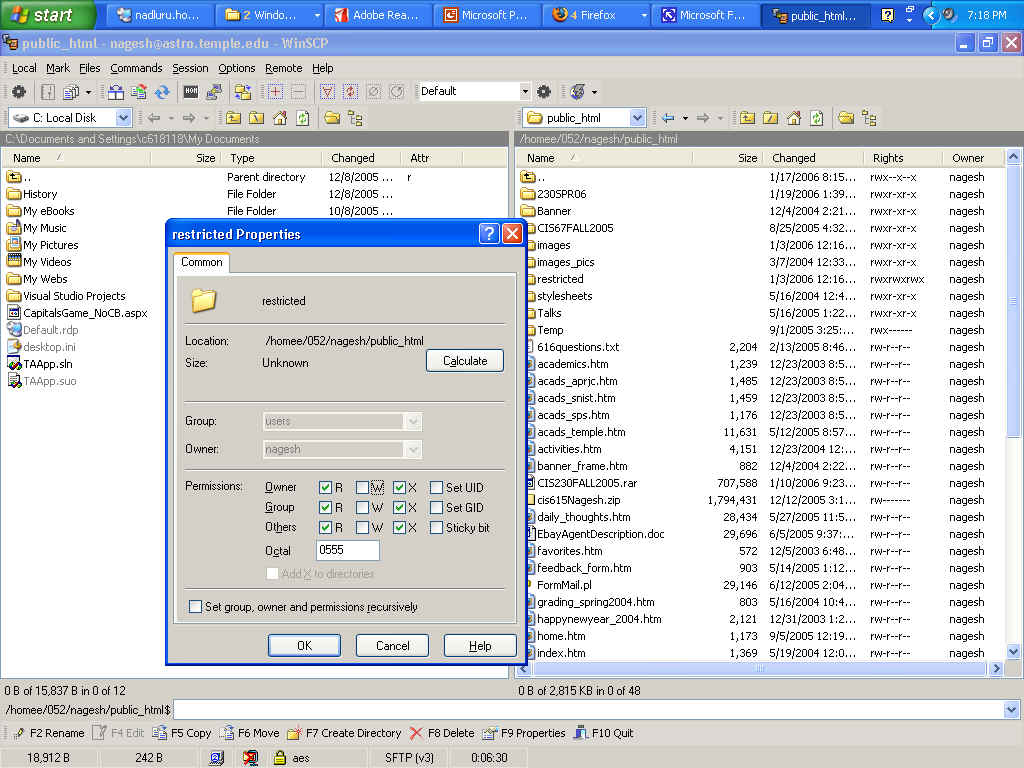
2.1.2.4 Permissions: Right click (file/folder) and click properties and open up properties and make sure you give R and X permissions to folders and R permissions to files.
2.2 Part II:
First create a directory in your website and place pages that you want to be
password protected. Make sure you have hyperlinks to those pages from some
pages outside the directory. Remember that directory name as you will need
it. Then you need to create two files (that act as guards to the directory).
2.2.1 First file (Name of the file .htaccess)
Using any standard text editor (like Notepad or Textpad) create a file with name exactly as .htaccess
The contents of the file should be as follows:
AuthUserFile $HOME/public_html/directory_name/.htpasswd
AuthName "Restricted
Access"
AuthType Basic
Require valid-user
Note:
The environment variable $HOME must be replaced by the actual value
which you noted earlier in Part I. directory_name must be replaced by the name
of the directory you created in Part II.
2.2.2 Second file (Name of the file .htpasswd)
You need a linux account to create this file.
Procedure to create the file:
Download the file onto your network drive (like G:, Z: etc.)
Open a DOS prompt (Click Run->Cmd). Go to your network drive in the prompt by just typing the drive letter followed by semi-colon G:, or Z:.
Run the following command
htpasswd -c .htpasswd username
You
will be prompted for entering the password. Enter the password and the
.htpasswd file will be created.
2.2.3 Publish the two files
Use the procedure shown in Part I to publish these two files into the
directory you created in Part II
3. Check for permissions
Using the WinSCP program you have to make sure that the files have read permission to everybody and the directories have read and execute permissions to everybody. You can check by right-click on the file/directory and clicking properties.
4. Submit (to nagesh@temple.edu)
Email subject: 230-xxxx-Lab-y
(xxxx- last four digits of your TUID, y-lab number)
Email content: URL to your website, username and password you used for Part II.